Welcome to RapidQuote3D
An introduction to the RapidQuote3D platform — what it does, how it works, and the key concepts you need to know to get started.
What Is RapidQuote3D?
RapidQuote3D is an all-in-one quoting and order management platform built for 3D printing businesses. It allows your customers to upload 3D model files, receive instant pricing, and place orders — all through a widget you embed directly on your own website.
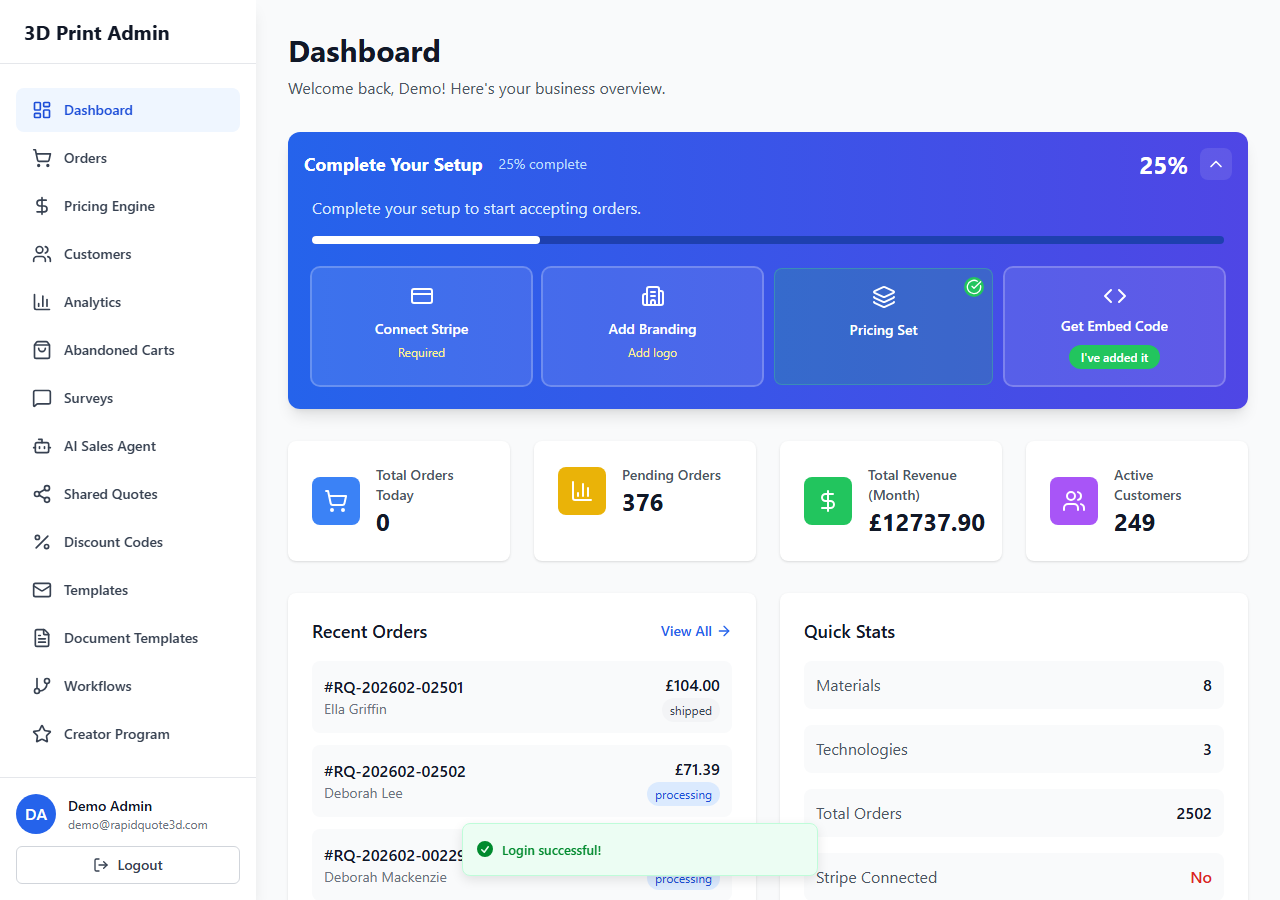
Behind the scenes, you control every aspect of pricing, materials, branding, and fulfilment from a powerful admin dashboard.
How It Works
- You configure your pricing — Set up your printing technologies, materials, colours, infill options, and service add-ons in the Pricing Engine.
- You embed the widget — Copy a small iframe code snippet and paste it into any page on your website.
- Customers upload and order — Visitors upload STL, OBJ, 3MF, or STEP files, choose their configuration, and check out via Stripe.
- You manage orders — New orders appear in your admin dashboard where you can track, update, and fulfil them.
Key Concepts
The Embed Widget (Storefront)
The embed widget is the customer-facing side of RapidQuote3D. It is an iframe that loads on your website and provides a complete quoting experience — file upload, 3D model analysis, configuration selection, shopping cart, and Stripe checkout. You can customise its appearance with your own logo, brand colour, trust cards, and client logos.
The Pricing Engine
The Pricing Engine is where you define how prices are calculated. It is organised into tabs for Technologies, Materials, Service Options, and more. Each technology can have its own machine hourly rate, setup fees, build volumes, and volume-based pricing brackets. Materials are linked to technologies and carry their own cost-per-kg, markup, and margin settings.
Order Management
When a customer completes checkout, an order is created in your Orders page. Each order shows the customer details, the 3D models they ordered (with an interactive viewer), pricing breakdown, and status tracking. You can filter, sort, and export orders as CSV.
The Admin Dashboard
Your dashboard is your home screen. It shows stat cards for today's orders, pending orders, monthly revenue, and active customers. When you first set up, you will see an onboarding checklist guiding you through connecting Stripe, adding branding, configuring pricing, and embedding the widget.
What You Should Do First
- Complete the onboarding checklist on your Dashboard
- Set up your branding in Settings > Branding
- Connect Stripe in Settings > Payments
- Configure at least one technology and material in the Pricing Engine
- Copy your embed code from Settings > Iframe Embed Code and add it to your website
The following guides in this series walk you through each of these steps in detail.
Need help with this topic? Contact our support team