Installing the Embed Widget on Your Website
How to find your embed code, copy it, and add the RapidQuote3D quoting widget to any page on your website.
Finding Your Embed Code
- From the left-hand sidebar, click Settings.
- Select the Iframe Embed Code tab from the horizontal tab bar. It is the last tab in the list.
- You will see two key pieces of information: your API Key and your Embed Code.
Your API Key
Your API key uniquely identifies your account and links the embed widget to your pricing, branding, and order system. It is displayed in a read-only field with two buttons beside it:
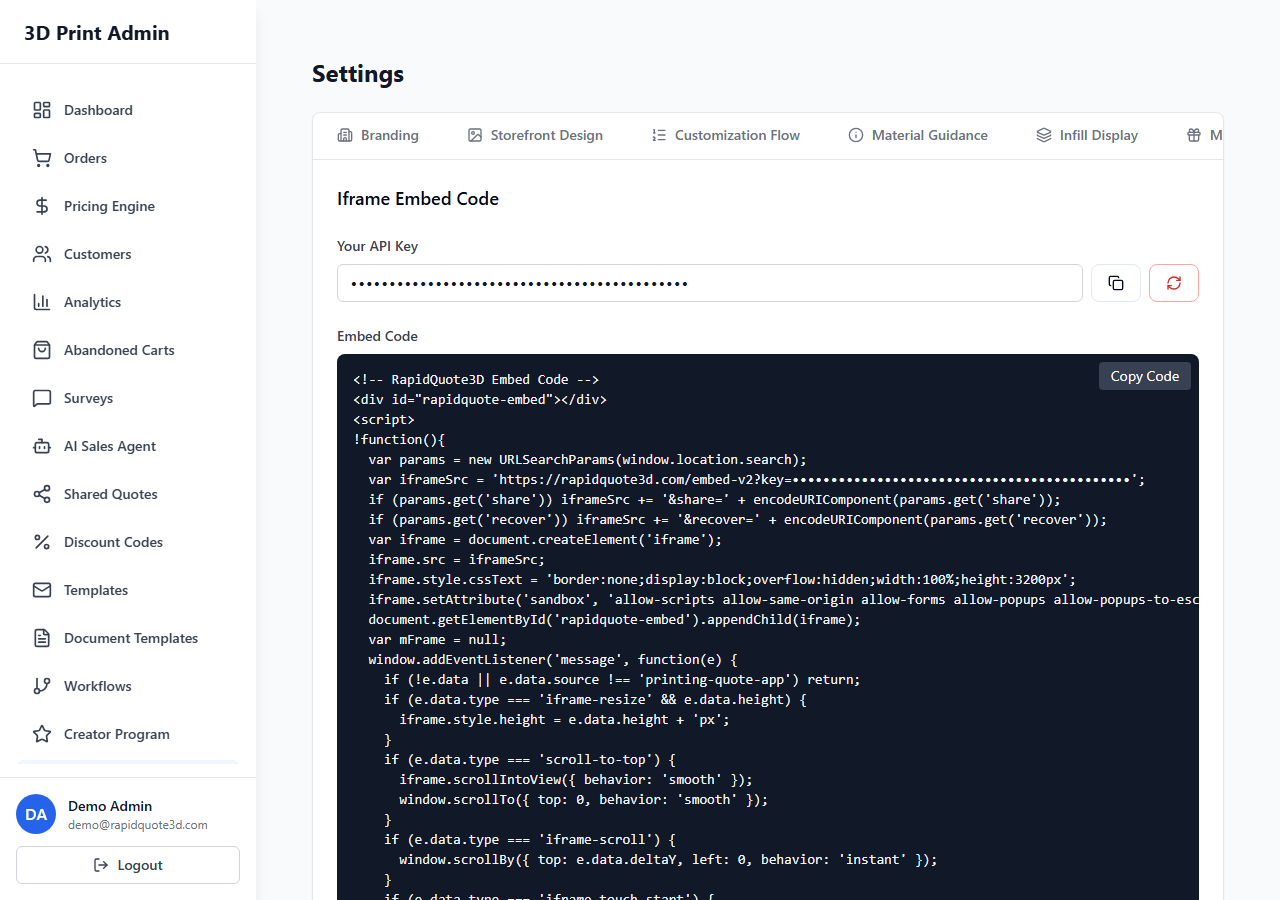
- Copy (clipboard icon) — Copies the API key to your clipboard.
- Regenerate (refresh icon, in red) — Generates a new API key. Warning: regenerating your key will immediately break any existing embeds on your website until you update them with the new key.
The Embed Code
Below the API key, you will find the full embed code displayed in a dark code block. This is an iframe snippet that you paste into your website's HTML. Click the Copy Code button in the top-right corner of the code block to copy it to your clipboard.
The embed code contains your API key as a URL parameter (key=YOUR_API_KEY). This is how the widget knows which account's pricing and branding to load.
Adding the Widget to Your Website
- Copy the embed code using the Copy Code button.
- Open the page on your website where you want the quoting widget to appear (e.g. your "Get a Quote" or "3D Printing" page).
- Paste the iframe code into the HTML of that page. If you use a CMS like WordPress, Squarespace, or Wix, look for a "Custom HTML" or "Embed" block.
- Save and publish the page.
- Visit the page in your browser to confirm the widget loads correctly.
URL Parameters
The embed URL supports the following parameters:
- key (required) — Your unique API key. Without this, the widget will not load.
- demo=true (optional) — Adds a demo mode indicator. Useful for testing your widget before going live.
Testing Your Embed
Before directing real customers to the page, test the full flow:
- Upload a sample STL or OBJ file to confirm file upload works.
- Select a technology, material, colour, and infill to verify your pricing configuration loads correctly.
- Add an item to the cart and proceed to checkout to confirm Stripe is working.
- Check that your logo, brand colour, and any trust cards appear as expected.
Marking It as Complete
Once you have added the embed code to your website, return to your Dashboard. In the onboarding checklist, you will see a "Get Embed Code" tile. Click the I've added it button to mark this step as complete and update your setup progress.
Updating Your Storefront Page URL
After embedding, go to Settings > Branding and enter the full URL of the page where you placed the widget in the Storefront Page URL field. This URL is used for shared quote links, abandoned cart recovery emails, and customer notifications.
Need help with this topic? Contact our support team