Setting Up Your Branding
How to customise your company branding in RapidQuote3D — upload your logo, set your brand colour, and fill in company details for invoices.
Navigating to Branding Settings
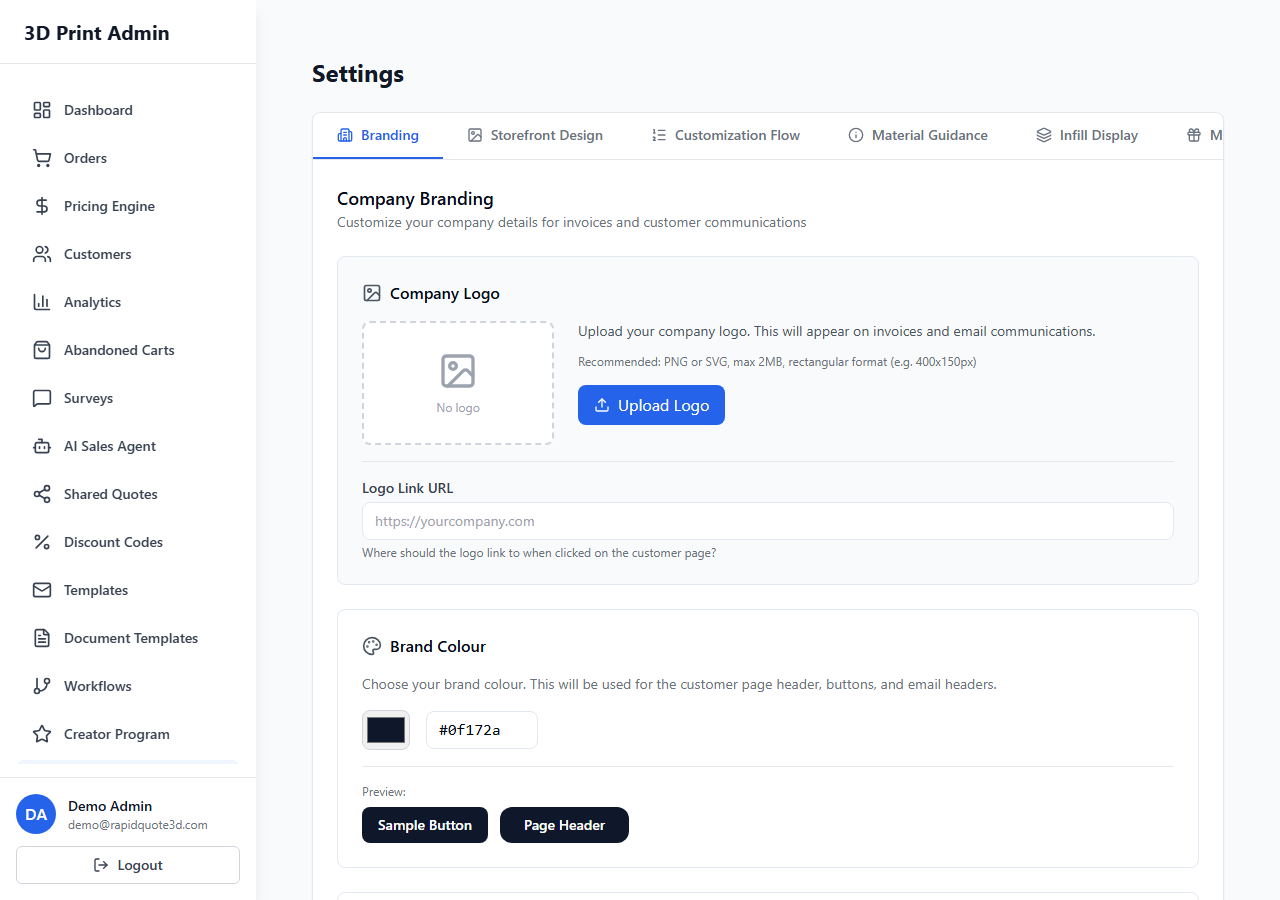
From the left-hand sidebar, click Settings. Then select the Branding tab from the horizontal tab bar at the top of the page. This opens the Company Branding settings panel.
Uploading Your Logo
The first section is Company Logo. Your logo appears on your customer-facing storefront, invoices, and email communications.
- Click the Upload Logo button.
- Select an image file from your computer. PNG or SVG format is recommended, with a maximum file size of 2MB. A rectangular format (e.g. 400x150px) works best.
- The logo preview will update immediately once the upload is complete.
To remove your logo, click the Remove button that appears next to the upload button once a logo has been set.
Below the logo preview, you will find a Logo Link URL field. Enter your company website address here — when customers click your logo on the storefront page, they will be taken to this URL.
Setting Your Brand Colour
In the Brand Colour section, you can choose a colour that will be applied to the customer page header, buttons, and email headers.
- Click the colour picker square to open a colour selector, or type a hex code directly into the text field (e.g.
#2563eb). - A live preview appears below showing how the colour will look on a sample button and page header element.
- If you wish to revert, click the Reset to default link which sets the colour back to
#0f172a.
Company Information
The Company Information section contains fields that appear on customer invoices. Fill in the following:
- Company Name (required)
- Address Line 1 and Address Line 2
- City and Postcode
- Country
- Phone and Email
- Website
There are also two important link fields:
- Storefront Page URL — The page on your website where the quote widget is embedded. This URL is used in shared quote links, abandoned cart recovery emails, and order notifications.
- Embed API Key — Your API key from the Embed Code tab. Paste it here so that customer email links work correctly.
Tax & Legal Information
For professional invoices, fill in your VAT Number and Company Registration Number. These appear in the legal section of generated invoices.
Invoice & Email Settings
The final section lets you configure:
- Invoice Footer Text — A custom message at the bottom of all invoices (e.g. payment terms).
- Bank Details — Your bank information for invoice payments.
- Email Footer Disclaimer — Text that appears at the bottom of all customer emails.
Saving Your Changes
After making your changes, click the Save button at the bottom of the page. A success notification will confirm your settings have been saved.
Need help with this topic? Contact our support team