Connecting Stripe for Payments
Learn why Stripe is required, how to connect your account through Settings, and what happens once your Stripe integration is active.
Why Stripe Is Required
RapidQuote3D uses Stripe Connect to process customer payments. When a customer completes checkout on your embedded storefront, payments go directly to your Stripe account. Without a connected Stripe account, customers will not be able to place orders.
Stripe handles all card processing, security, and PCI compliance, so you do not need to worry about storing sensitive payment data.
How to Connect Stripe
- From the left-hand sidebar, click Settings.
- Select the Payments tab from the horizontal tab bar.
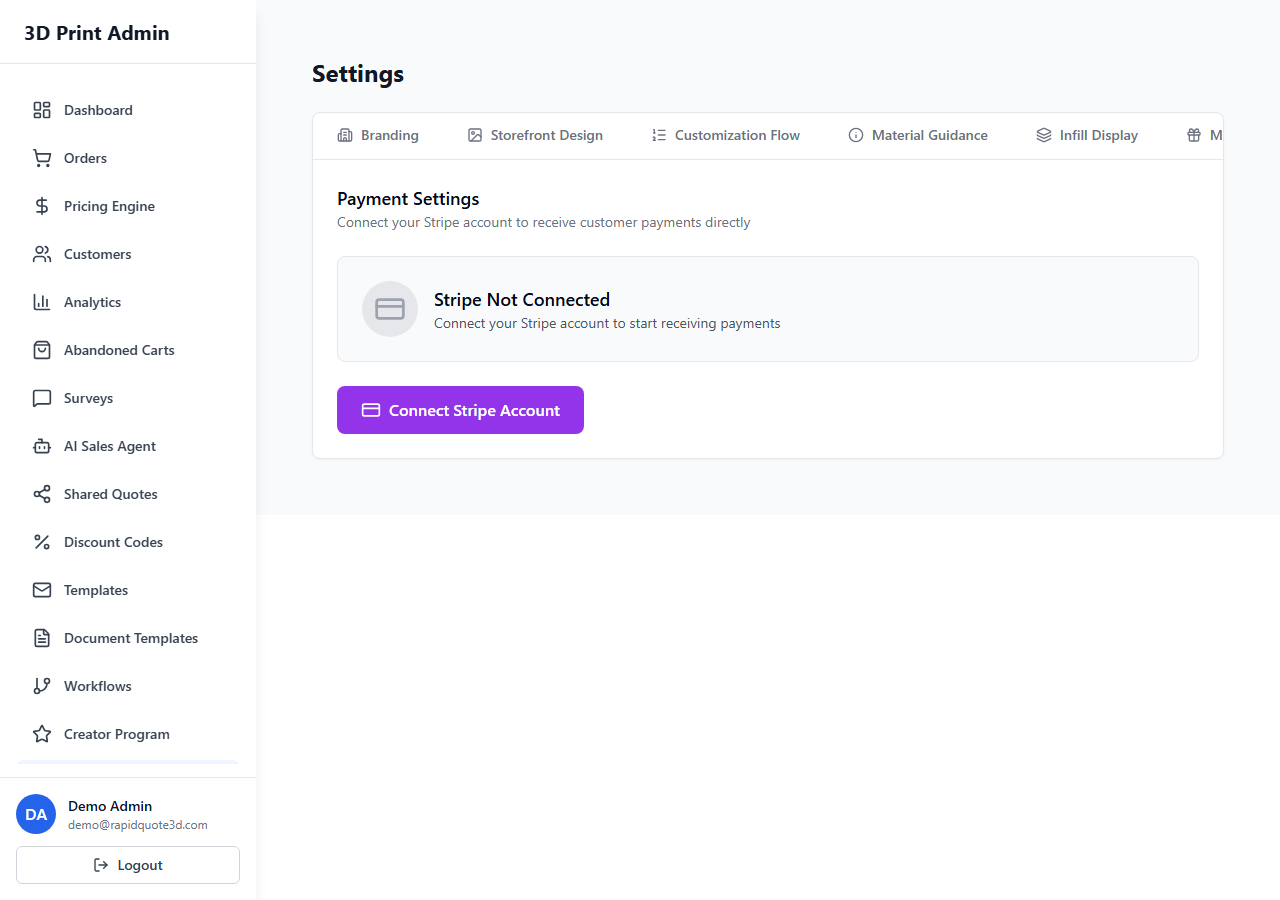
- You will see the Payment Settings page with the heading "Connect your Stripe account to receive customer payments directly."
- Click the Connect Stripe button. You will be redirected to Stripe's onboarding flow.
- Follow Stripe's instructions to provide your business details, bank account information, and identity verification.
- Once complete, Stripe will redirect you back to RapidQuote3D with a success message.
Understanding the Connection Status
After returning from Stripe, the Payments tab shows a status card with three indicators:
- Can accept payments — Shows a green tick when Stripe has enabled charges on your account.
- Payouts enabled — Shows a green tick when Stripe can transfer funds to your bank account.
- Onboarding complete — Shows a green tick when all required information has been submitted.
The status card background changes colour to reflect your overall state:
- Green — Fully connected and ready to accept payments.
- Yellow — Connected but onboarding is incomplete. You need to return to Stripe to finish setup.
- Grey — Not yet connected.
If Onboarding Is Incomplete
If Stripe requires additional information (such as identity documents or bank details), the status card will show "Onboarding Incomplete" in yellow. Click the button to return to Stripe and complete the remaining steps. You will see a message: "Complete your Stripe onboarding to start accepting payments."
What Happens After Connection
Once Stripe is fully connected:
- Your Dashboard onboarding checklist will show the "Connect Stripe" step as complete with a green tick.
- The Quick Stats panel on your Dashboard will show "Stripe Connected: Yes" in green.
- Customers can now complete checkout and pay via credit or debit card on your embedded storefront.
- Orders will appear in your Orders page with payment status tracked automatically.
Important Notes
- You only need to connect Stripe once. The connection persists unless you explicitly disconnect it.
- If your Stripe account has issues (e.g. expired identity verification), the status indicators will update to reflect this.
- Your Stripe business name is displayed on the connection status card once linked.
Need help with this topic? Contact our support team