Managing Your Customer Database
Explore the Customers page to search, filter, and manage your customer records, view order histories, add internal notes, and assign customers to team members.
Accessing the Customers Page
Click Customers in the left-hand sidebar of your admin dashboard to open the customer database. This page lists every customer who has placed an order or created an account through your quoting widget.
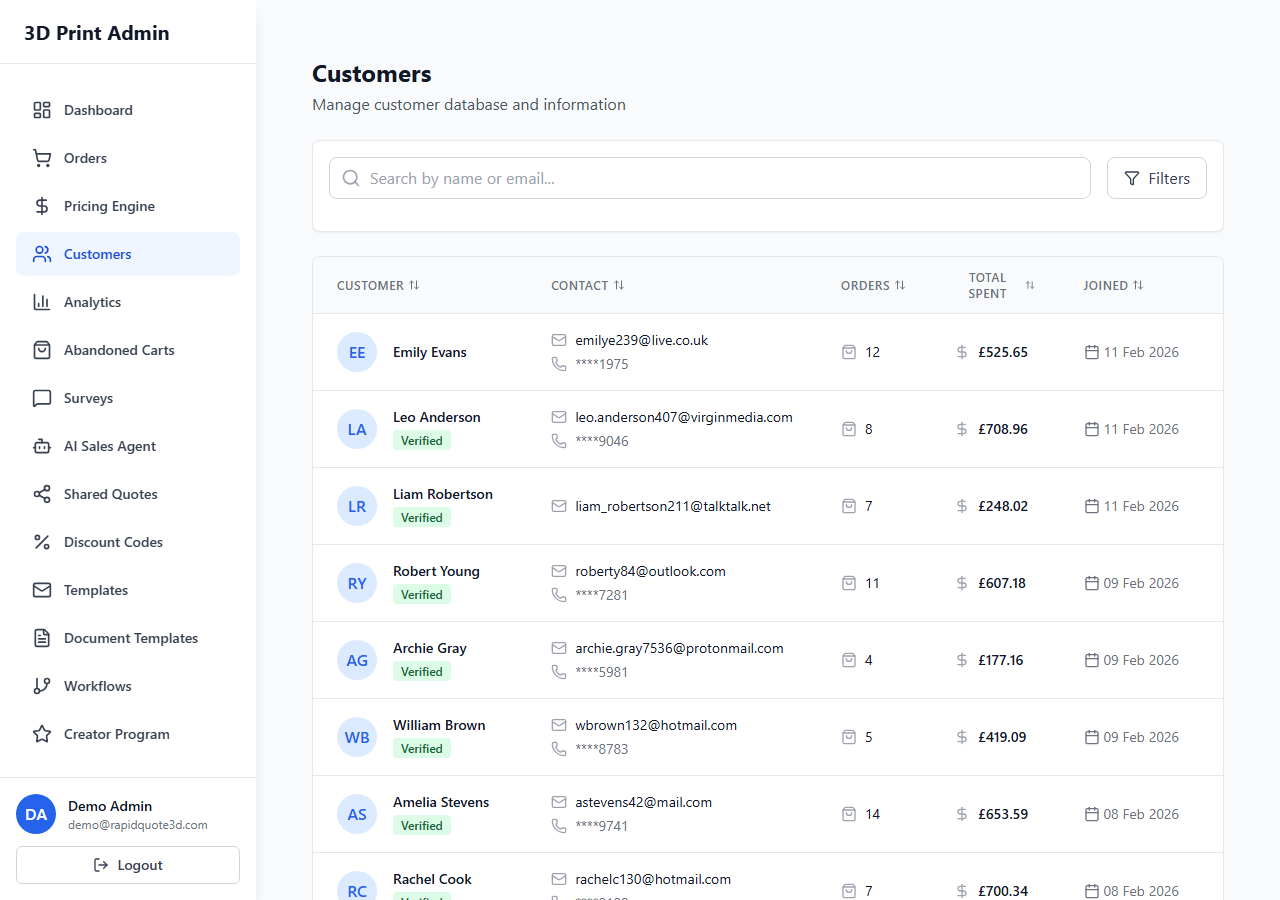
Customer List Overview
The customer list table displays the following information for each customer:
- Name – The customer’s full name.
- Email – Their email address, which also serves as their unique identifier.
- Orders – The total number of orders they have placed.
- Total Spent – The cumulative value of all their orders.
- Last Order – The date of their most recent order.
- Assigned To – The team member responsible for this customer, if assigned.
Filtering and Searching
Use the search bar at the top of the customer list to find customers by name or email address. Results update as you type, making it quick to locate a specific person.
You can also sort the table by clicking any column header. For example, click Total Spent to sort by your highest-value customers, or click Last Order to find customers who have not ordered recently.
Customer Profile Page
Click on any customer row to open their full profile page. The profile is divided into several sections:
Contact Information
The top section displays the customer’s name, email address, phone number (if provided), and delivery address. This information is pulled from their most recent order.
Order History
A complete table of every order the customer has placed is shown below the contact details. Each row shows the order number, date, status, and total. Click any order number to jump directly to that order’s detail page.
This view makes it easy to understand a customer’s ordering patterns, identify repeat buyers, and quickly pull up past jobs if the customer contacts you with a query.
Internal Notes
The notes section lets you record private information about a customer that is only visible to your team. To add a note:
- Scroll to the Notes section on the customer profile.
- Type your note in the text area.
- Click Add Note.
- The note is saved with a timestamp and the name of the team member who wrote it.
Common uses for internal notes include recording customer preferences (e.g. “Prefers PLA over ABS”), communication history, or special instructions for future orders.
Assigning Customers to Team Members
If your business has multiple staff members, you can assign specific customers to a team member. This is useful for account management, where a single point of contact handles all interactions with key customers.
- On the customer profile, locate the Assigned To field.
- Click the field to open a dropdown of your team members.
- Select the team member you want to assign.
- The assignment is saved immediately.
Assigned team members can filter the Customers page to show only their assigned accounts, helping them manage their workload efficiently.
Tips for Managing Your Database
- Regularly review customers sorted by Total Spent descending to identify your most valuable accounts and ensure they receive excellent service.
- Use internal notes consistently so that any team member can pick up a customer conversation with full context.
- Sort by Last Order to identify lapsed customers who may benefit from a re-engagement email or discount code.
Need help with this topic? Contact our support team