Bulk Actions & CSV Export
Select multiple orders at once to perform bulk status changes, assign team members, or export your order data as a CSV file for accounting and reporting.
Selecting Multiple Orders
The Orders page supports multi-selection so you can act on several orders at once. To select orders:
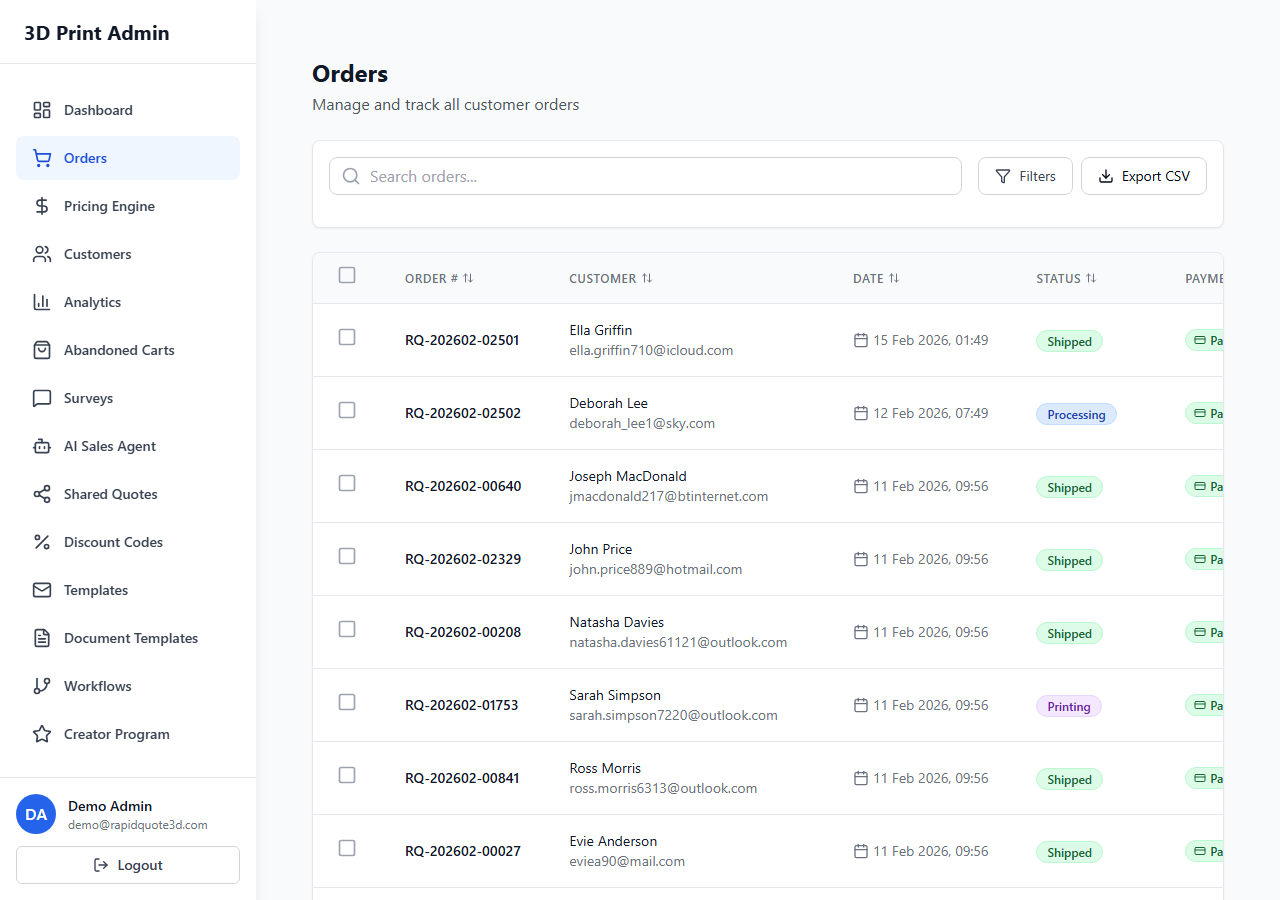
- Tick the checkbox on the left side of each order row you want to include.
- To select all visible orders on the current page, tick the checkbox in the table header row.
- A blue action bar appears at the top of the table showing how many orders are selected (e.g. “12 orders selected”).
You can combine selection with filters. For example, filter to “New” orders first, then select all to act on every new order at once.
Available Bulk Actions
With one or more orders selected, the action bar presents the following bulk operations:
Change Status
- Click the Change Status button in the action bar.
- A dropdown appears with all available fulfilment statuses.
- Select the target status (e.g. “In Print Queue”).
- Confirm the change in the dialog that appears. The dialog shows how many orders will be updated.
- All selected orders are updated simultaneously and a success toast notification confirms the action.
Note: Bulk status changes do not prompt for additional details like tracking numbers. If you need to add tracking information, update those orders individually.
Assign to Team Member
- Click the Assign button in the action bar.
- Select a team member from the dropdown list.
- Confirm the assignment. All selected orders will be assigned to that team member.
This is particularly useful when distributing the day’s workload across your production team.
Exporting Orders as CSV
The CSV export feature lets you download your order data for use in spreadsheets, accounting software, or custom reports.
How to Export
- Apply any filters you need (e.g. date range, status) to narrow the orders you want to export. Alternatively, leave all filters clear to export everything.
- Click the Export CSV button located in the top-right area of the Orders page.
- In the export dialog, choose between:
- Export Selected – Only orders you have ticked will be included.
- Export Filtered – All orders matching your current filters will be included (even across multiple pages).
- Export All – Every order in your account will be included.
- Click Download. The CSV file is generated and downloaded to your browser’s default download folder.
CSV Column Format
The exported CSV file contains the following columns:
| Column | Description |
|---|---|
| Order Number | Unique order reference |
| Customer Name | Full name of the customer |
| Customer Email | Email address |
| Order Date | Date and time of submission (ISO 8601 format) |
| Status | Current fulfilment status |
| Payment Status | Current payment status |
| Subtotal | Order value before VAT and delivery |
| VAT | VAT amount charged |
| Delivery | Delivery charge |
| Total | Final order total |
| Delivery Zone | The delivery zone assigned |
| Delivery Speed | Selected delivery speed tier |
| Discount Code | Applied discount code, if any |
| Items | Number of line items in the order |
Using Exports for Accounting
The CSV format is compatible with most accounting tools including Xero, QuickBooks, and FreeAgent. You can filter by date range to match your accounting period (e.g. monthly or quarterly), then import the CSV directly into your accounting software. The VAT column is particularly useful for VAT returns.
For custom reporting, open the CSV in a spreadsheet application like Excel or Google Sheets to create pivot tables, charts, or filtered views of your order data.
Need help with this topic? Contact our support team